Saturday, July 31, 2010

Buttons to Cabs - Easy!

Alot of the shank buttons in my shop can easily be turned into cabochons. Here's how...

You'll need the following supplies: plastic shank buttons, cutters, and sunglasses. Well...you don't really need sunglasses but the shanks you cut off do fly all over the place. Plus, the cutters clearly state to use safety glasses. ;) The cutters can be found in the jewelry section of any craft store.


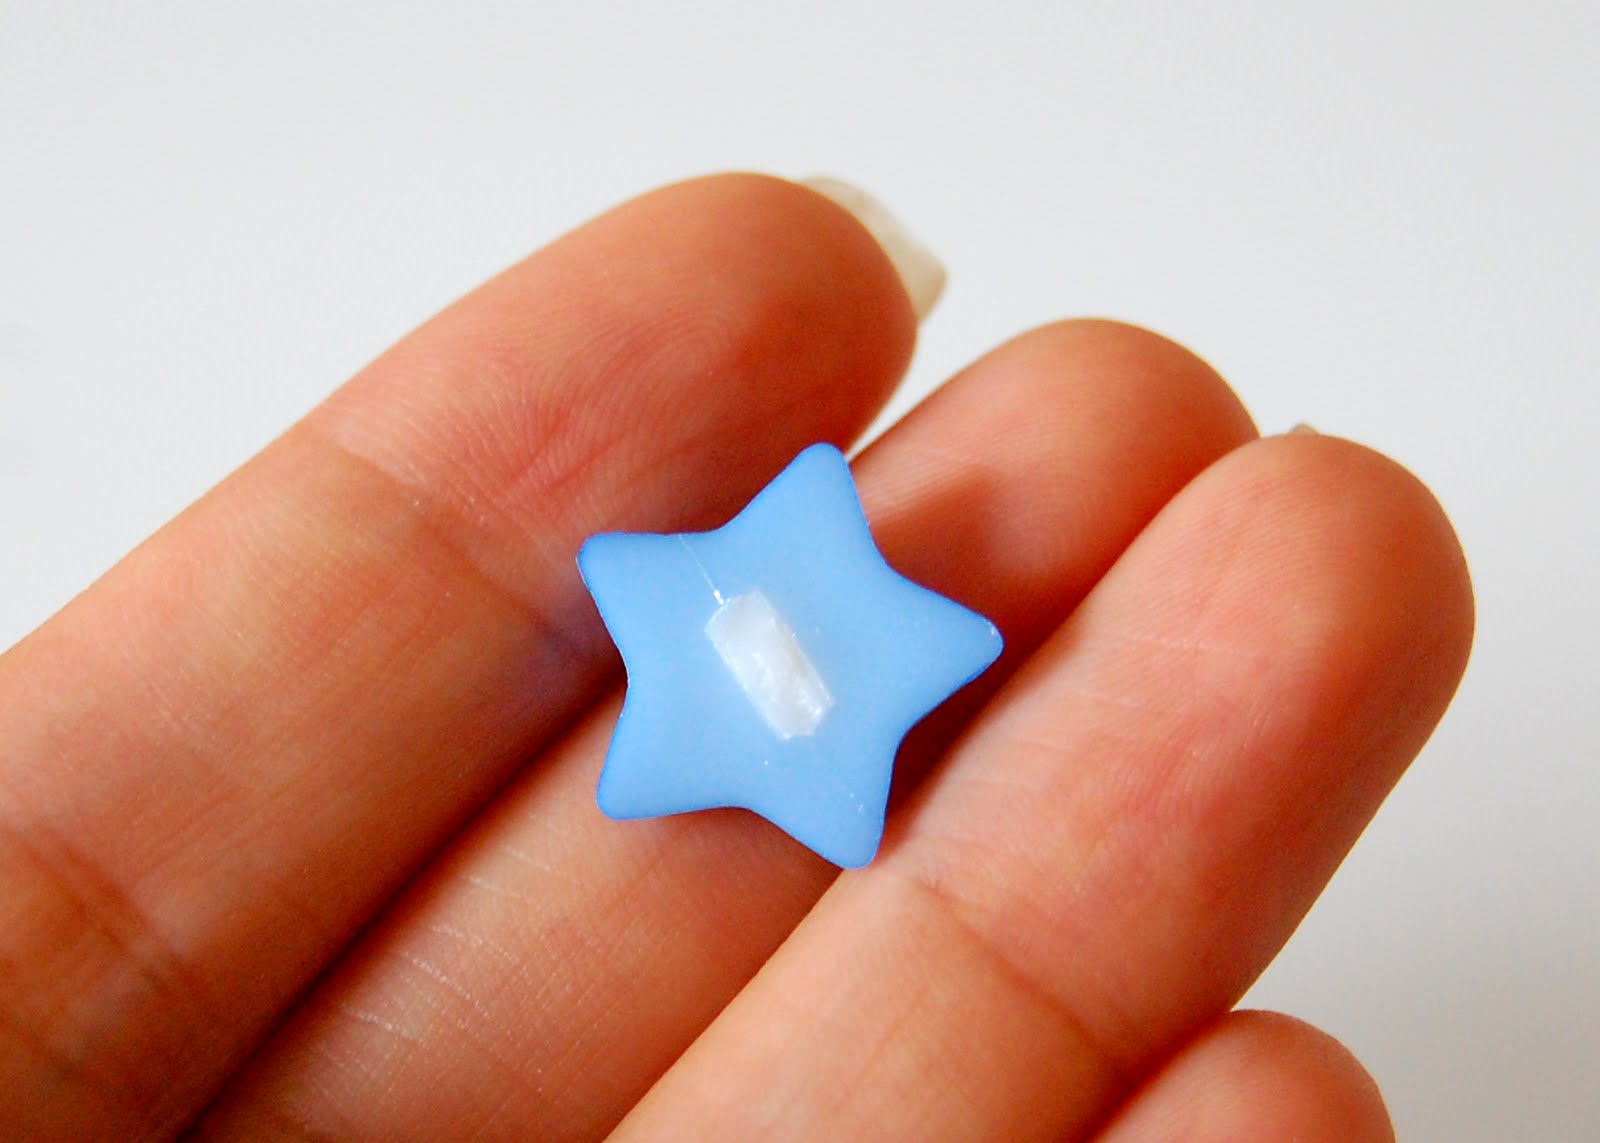
Here's a look at the back of the buttons. The buttons I'll be using are the star shaped buttons from my shop.


When cutting the shank, I suggest cutting both sides at the same time (as pictured). When you cut each side seperately, the cuts are not smooth so you'll have to go back and snip off the excess.


Here is what the button looks like once the shank is cut off. The are will be white but it's no biggie since this is generally the side that is glued when crafting.


And here are the once star shaped buttons easily transformed to star shaped cabochons , nice and flat. Great for hairbows & clippies and just about any crafting project.


I also made some heart shaped cabochons out of some of the heart shaped buttons that are found at my shop.

Thursday, July 22, 2010

Now Available - 1.5 inch Buttons

I started adding 1.5 inch buttons to the mix. My first set is made from a really cute, vibrant pink fabric that I came across. Three color options are available for these large pink sewing buttons.

Thursday, July 15, 2010

Adding a Touch of Sparkle

So I'm trying something new with the fabric covered buttons I've been making. I started adding rhinestones to them to add some sparkle. An easy way to change them up a little. I just started listing them yesterday so we'll see how it goes.

fabric covered butterfly buttons


fabric covered flower buttons

Wednesday, July 7, 2010

Day of 100's

Listed my 100th item today at my shop on Etsy and also got my 100th shop heart today! Now I just need to hit 100 sales...only have 13 sales to go! Need to start planning some new goals.

Tuesday, July 6, 2010

My Home Photo Studio


My 4th of July weekend was spent with family but for the little bits of time I did have, I was in front of my camera taking shots of my new products. Here's a peek at my lightbox setup.


I purchased my lightbox from OBN Photo for under $40. I love it! It easily folds up into a teeny packet and came with a pouch for easy storage. It also came with different colored backgrounds (gray, blue, and black). My only complaint is that it has lost it's shape since I've gotten it. As you can see from the photo, it's a little warped but it still gets the job done.

I purchased the silver dome lamps for the lighting at Home Depot (under $6 each). It has taken me forever to figure out the placement for the lights but this setup seems to work best for my needs right now.

My favorite background to use is plexiglass. I like how it lightly reflects the product. I think it would be wonderful to use for photographing jewelry. Here's an example of the reflection with my Sweets Deco Tape.


The only place I was able to find the plexiglass sheet was online. I purchased mine from eStreetPlastics which had the best prices. The 12" x 12", 1/8" thick sheet was perfect for my needs. I also like to use scrapbook sheets, especially for my white products. They are inexpensive and easily add color, texture, or patterns which can really make your item pop.

Etsy Forums has a lot of useful info on photographing products and editing photos. I've learned a lot from there and continue to learn a lot. I've come a long way with my photos but I still have a long way to go.

Sunday, July 4, 2010

Saturday, July 3, 2010

Endless Possibilities with an Envelope Template

One of the best items I got in my shipment from Japan was an envelope template by Anticca (Decole). It is made of wood and makes custom envelope-making super simple. You can use anything to make an envelope - newspaper, wrapping paper, card stock, etc. Below is a quick tutorial on an envelope I made using the template. For the paper, I used a scrapbook page that I got from Hobby Lobby for 59cents.

Here are the items you will need:


Trace the envelope template onto the back of the paper:


Cut the paper along the line you created with the template, then fold the flaps in along the fold line you traced. Put glue on the right and left flaps, then fold the bottom flap up and press along the right and left sides to seal.


And wa-la! Don't forget to erase the top fold line you traced otherwise the recipient will see it when they open the envelope. You actually do not need to trace the fold lines, I skipped that part for my second envelope and it came out just fine.


Here's another one I made for a card my little girl made for a birthday party she's going to. Super cute, super easy!

Friday, July 2, 2010

Shipment of Cuteness

Got my shipment of cuteness in from Japan today. Guess I know what I'll be doing for the next few days....involves camera and computer. I'm excited about being able to offer some more variety in my shop. Here's a sneak peak:


Thursday, July 1, 2010

Fabric Covered Buttons

I decided to start making fabric covered buttons to add some variety to my shop. Here are the first sets I created.


Butterflies Are Here!

The commercial got my daughter, my daughter got my dad, and now we got butterflies! Grandpa bought my daughter one of those butterfly kits that you see on TV a few weeks ago and they've started to come out of their cocoons. We got one last night and woke up to 3 more butterflies this morning. We have 6 cocoons left so I am hoping that we will get to see at least one of them coming out of their cocoon.


My daughter and I really enjoyed the whole experience and highly recommend the kit. She would get so excited about each stage the caterpillar went through. The butterflies are really friendly and it's really neat to watch them extent their proboscis to drink the sugar water we made them. If you ever plan to try it out, make sure you go to http://www.livebutterflygarden.com/. They give 5 more caterpillars for free, so a total of 10 caterpillars. Other websites only give 5 caterpillars even though they are from the same company, Insect Lore.


We'll be setting them free this weekend into my mom's beautiful garden. Wonder how long before they fly away.